
Setting up Continuous Deployment to Nano Server in Azure - Part 2
This blog post will cover how to deploy an Azure Runbook to the Azure Automation account created in the previous article and how configure it to trigger the deployment of a .NET Application from Github to the Nano Server using a Webhook.
Overview
This article is the second in a series of blog posts on setting up continuous deployment to Nano Server in Azure.
- Setting up Continuous Deployment to Nano Server in Azure - Part 1
- Setting up Continuous Deployment to Nano Server in Azure - Part 2
- Setting up Continuous Deployment to Nano Server in Azure - Part 3
This article will cover the following:
- Create a new GitHub Repository for the .NET Application
- Deploying a Runbook to push changes from GitHub to the Nano Server
- Creating a new Webhook for the Runbook
- Adding the Runbook Webhook to the GitHub Repository
- Verify the .NET Application was triggered by the Webhook
Prerequistes
All of the resources that were deployed in Azure in Part 1 of this series are required to be in place before continuing.
Additionally the following items are required.
- Follow the instructions below on a host running Windows 8.1 and higher or Windows Server 2016 RTM.
- Verify that you have access to a Co-Administrator or an Azure Organizational Account with access to an existing Azure Subsciption.
- A basic understanding of GitHub as well as access to a Free GitHub Account is required.
Create a new GitHub Repository for the .NET Application
Create a new repository in your GitHub Account called nano-deploy-demo and initialize it with a README.md file.
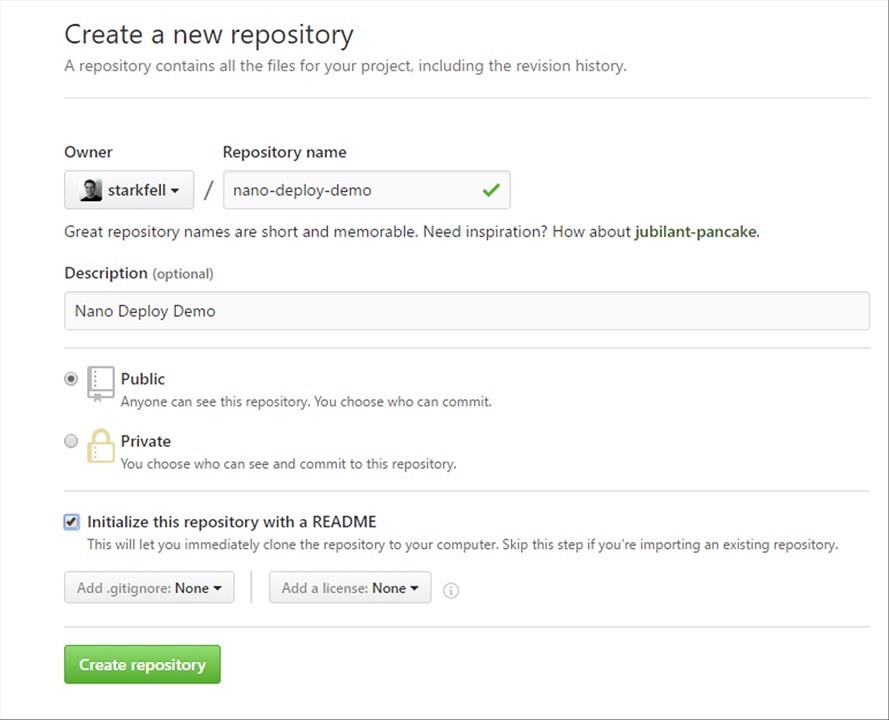
Download the CoreWebAppDemo.zip and upload it to the nano-deploy-demo Repository.
Deploy a new Runbook to the Azure Automation Account
The Runbook that we will be deploying to the Azure Automation Account, rb-Deploy-CoreWebAppDemo-To-Nano-Server.ps1, can be accessed here.
Login to the Azure Portal and go to the Subscription where you deployed the resources in Part 1.
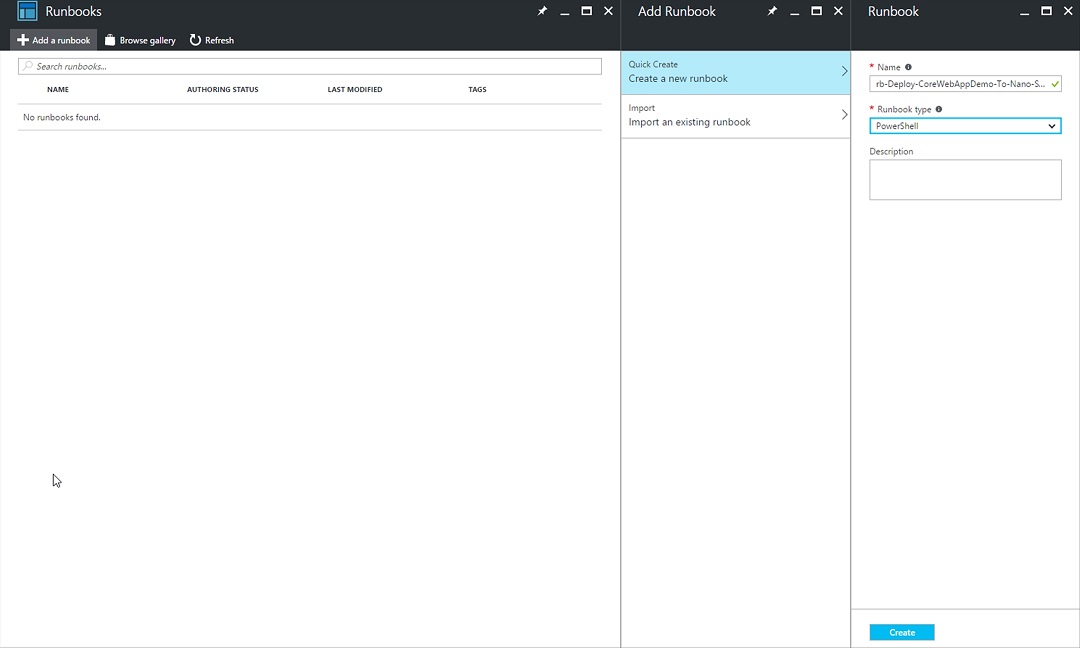
Go into the Resource Group where the Azure Automation account was deployed and click on Automation Account –> Runbooks –> Add a Runbook –> Create a new Runbook.
Type in the Name of the Runbook, rb-Deploy-CoreWebAppDemo-To-Nano-Server. Change the Runbook type to PowerShell and then click on the Create button at the bottom of the page.
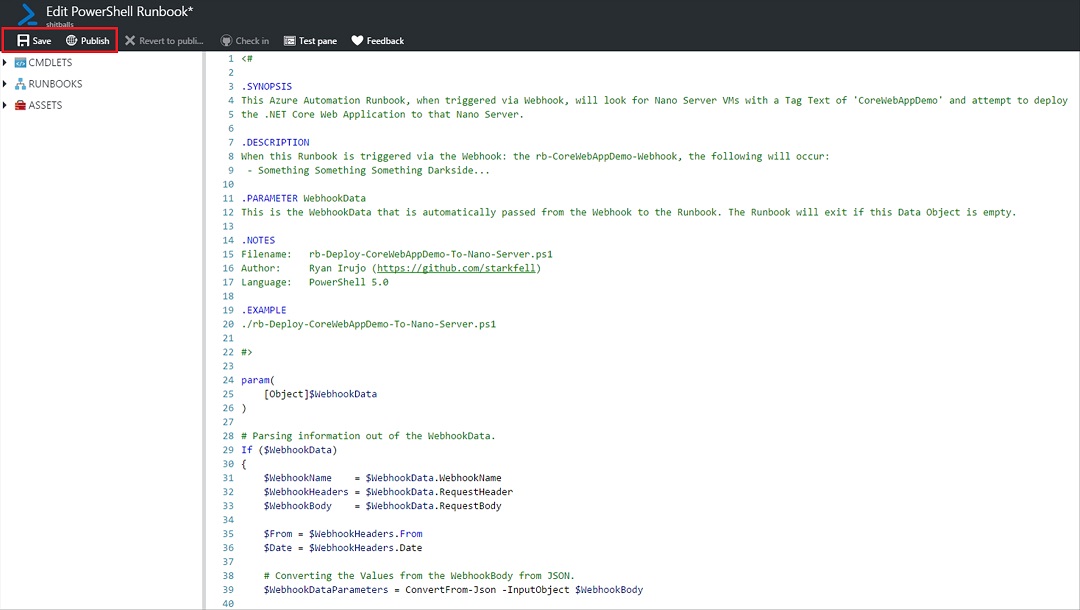
The Runbook will be created within a few seconds. Afterwards, the Runbook Editor will appear. If the Editor doesn’t appear, click on the Edit button. Paste in the contents of the Azure Automation Runbook, rb-Deploy-CoreWebAppDemo-To-Nano-Server.ps1.
Scroll down in the script to around line 205 and look for this URL:
https://github.com/starkfell/starkfell.github.io/blob/master/apps/continuous-deployment-to-nano-server-in-azure/CoreWebAppDemo.zip?raw=true
This URL is the location in my repository where the CoreWebAppDemo.zip file resides. This needs to be changed to the GitHub Respository you created earlier and uploaded the CoreWebAppDemo.zip file to.
Syntax:
https://github.com/<USERNAME>/<REPSOITORY_NAME>/blob/master/CoreWebAppDemo.zip?raw=true
Example:
https://github.com/starkfell/nano-deploy-demo/blob/master/CoreWebAppDemo.zip?raw=true
Click the Save button and then click the Publish button.
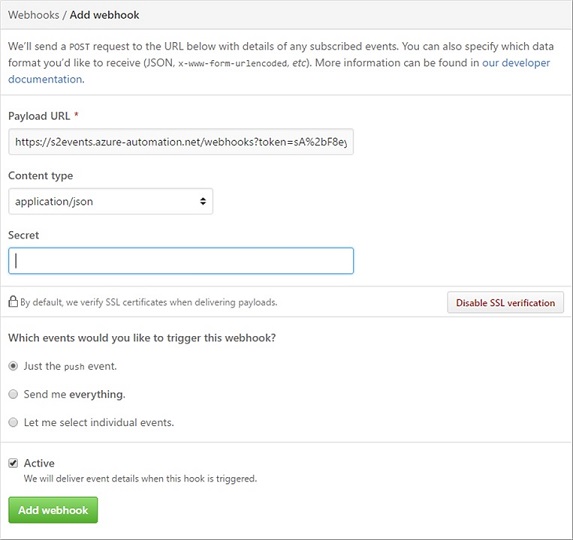
You should be taken back to the Runbook blade, click on Webhook –> Create new Webhook. Set the Name of the Webhook to demo-webhook, leave it Enabled and set it to expire next year. Make sure to copy the URL of the Webhook somewhere safe before clicking on the OK button.
Note: Feel free to change the expiration on the Webhook to a longer or shorter time period if necessary.
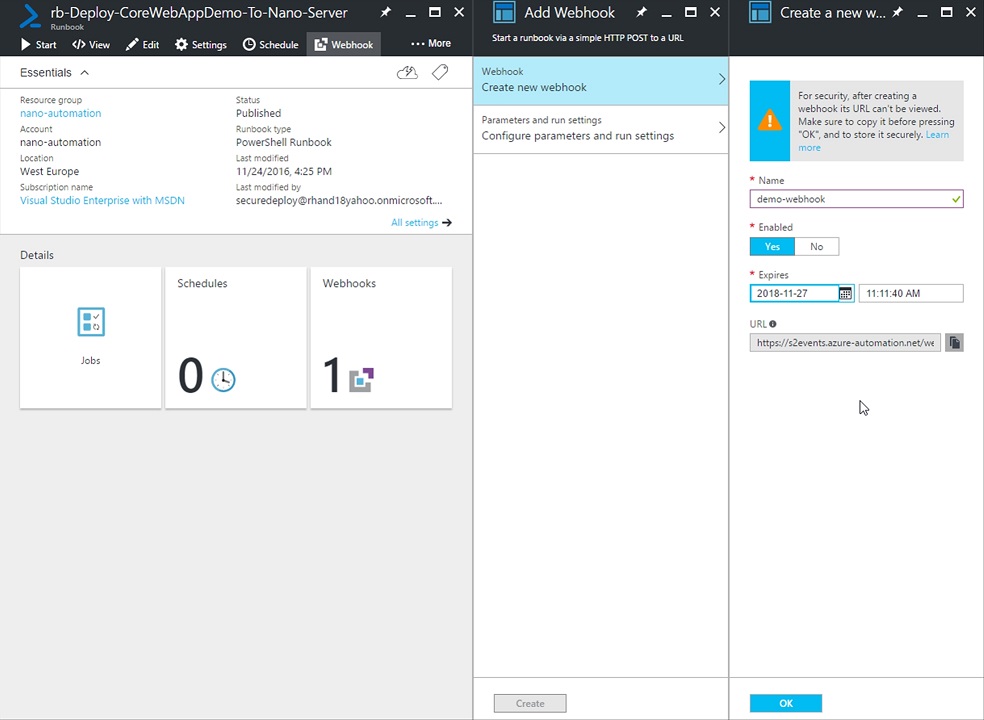
Click on the Parameters and run settings section, leave the Parameters and Run Settings as is and click on the OK button.
Back on the Add Webhook blade click on the Create button. The Webhook will be created and available within a matter of seconds.
Add the Webhook to your GitHub Repository
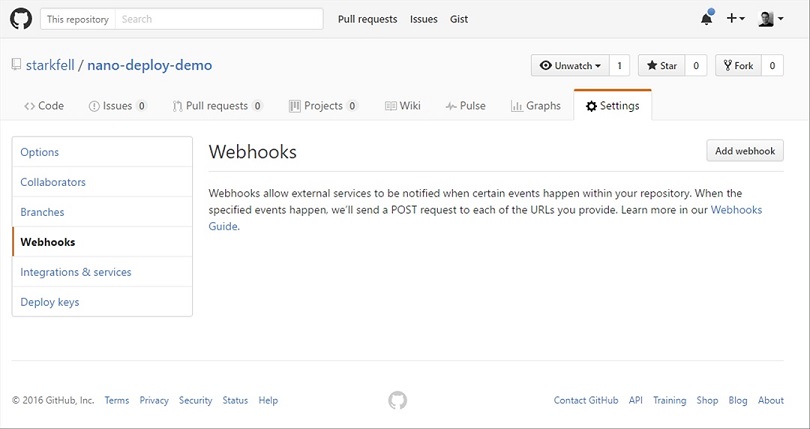
Back in your new GitHub Repository, nano-deploy-demo, click on Settings and then click on Webhooks and then click on Add webhook.
Paste in the URL of the Webhook that you created earlier and leave the rest of the default values. Afterwards, click on Add webhook.
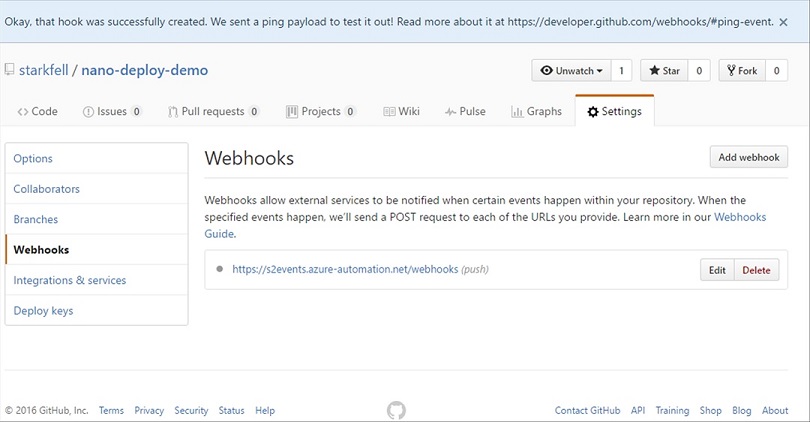
The Webhook will then be displayed in your Webhooks section of the nano-deploy-demo Repository as well as confirmation that the Webhook as created.
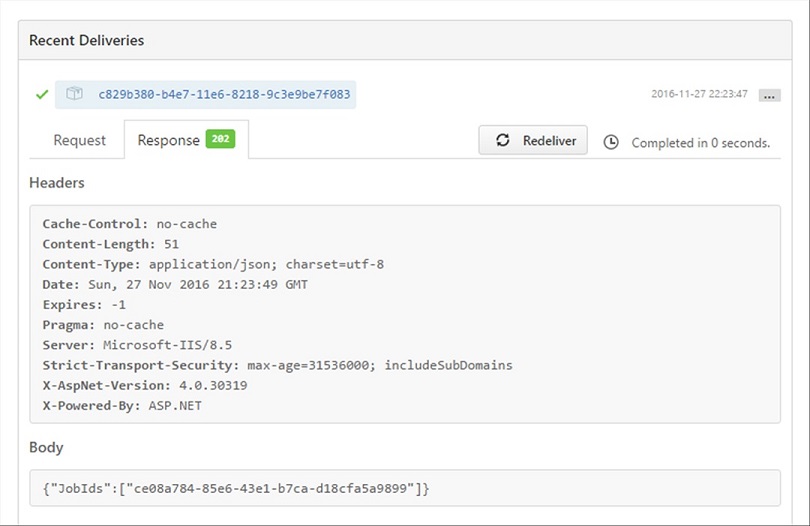
Click on the link to your webhook and scroll down to Recent Deliveries. Expand out the delivery and verify that the response was successful.
Verify the .NET Application was triggered by the Webhook
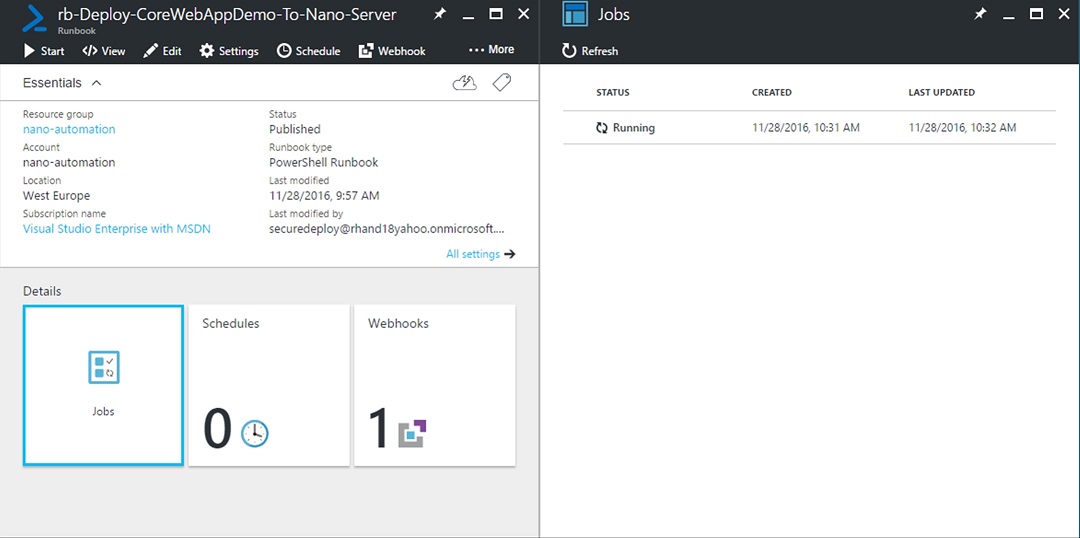
Login to the Azure Portal and browse to the Azure Automation Account and into to the rb-Deploy-CoreWebAppDemo-To-Nano-Server Runbook. Click on Jobs and then click on the job at the top. The Job will expand out to display the Job Summary.
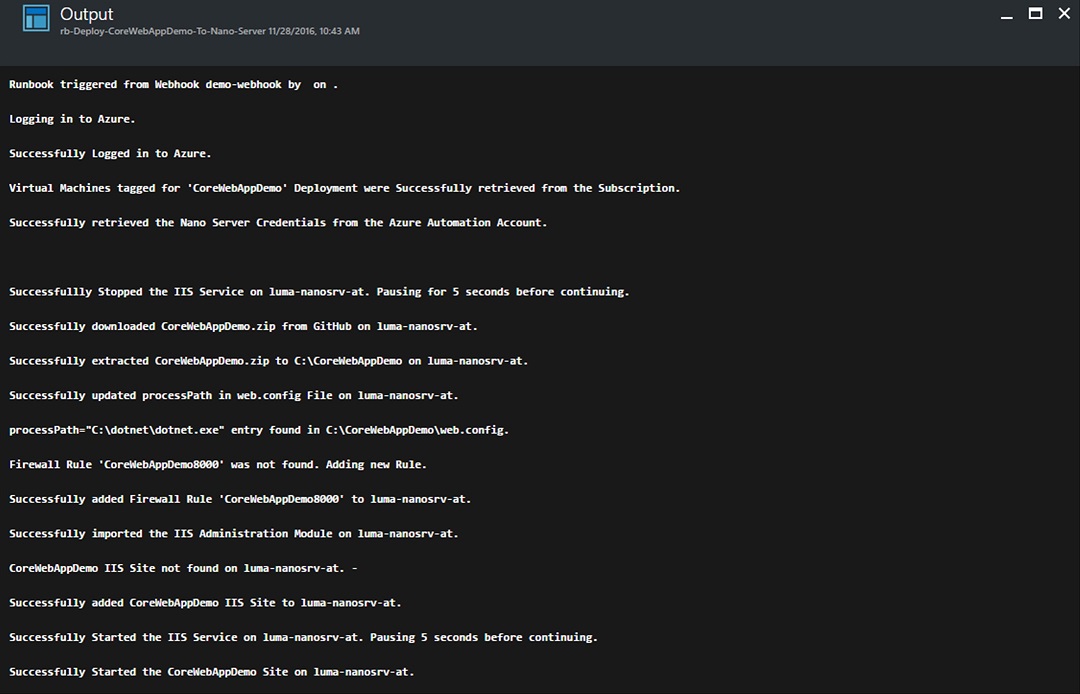
Click on the Output button to see the following output below from the completed job.
Finally, verify that you can access the .NET Application on the Nano Server that was previously deployed on port 8000.

Troubleshooting
You may get back the following in the Output window when the Runbook is triggered the first time.
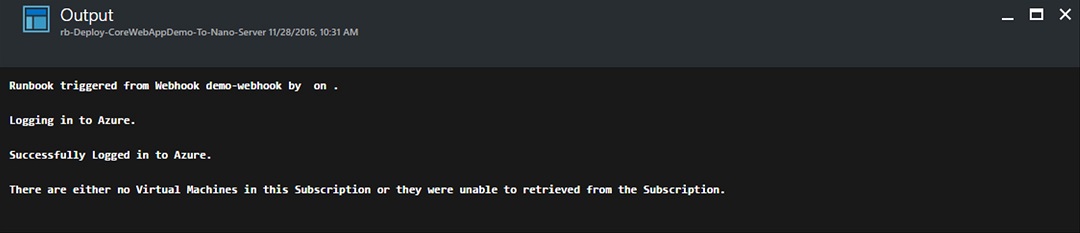
This is because there was an earlier version of the ARM Template that existed that did not add a Tag on the VM during deployment with the Key/Value of:
Key:   appDeployment
Value: CoreWebAppDemo
Create a Tag with this Key/Value pair on the Nano Server VM and retrigger the Webhook and the .NET Application should deploy sucessfully to the server.
Closing
In this article we covered how to deploy an Azure Runbook to the Azure Automation account created in the previous article and how to configure it to trigger the deployment of a .NET Application from Github to the Nano Server using a Webhook.
The next article will cover how to secure webhooks in Azure Automation and add them to GitHub using PowerShell.